IBM M13 Trackpoint USB Converter
Me, never not on the lookout for an opportunity to design something, whether needed or not, worked with @micon to design a module that could fit snugly in the keyboard, and provide a USB-C interface directly into the Keyboard/Mouse module.


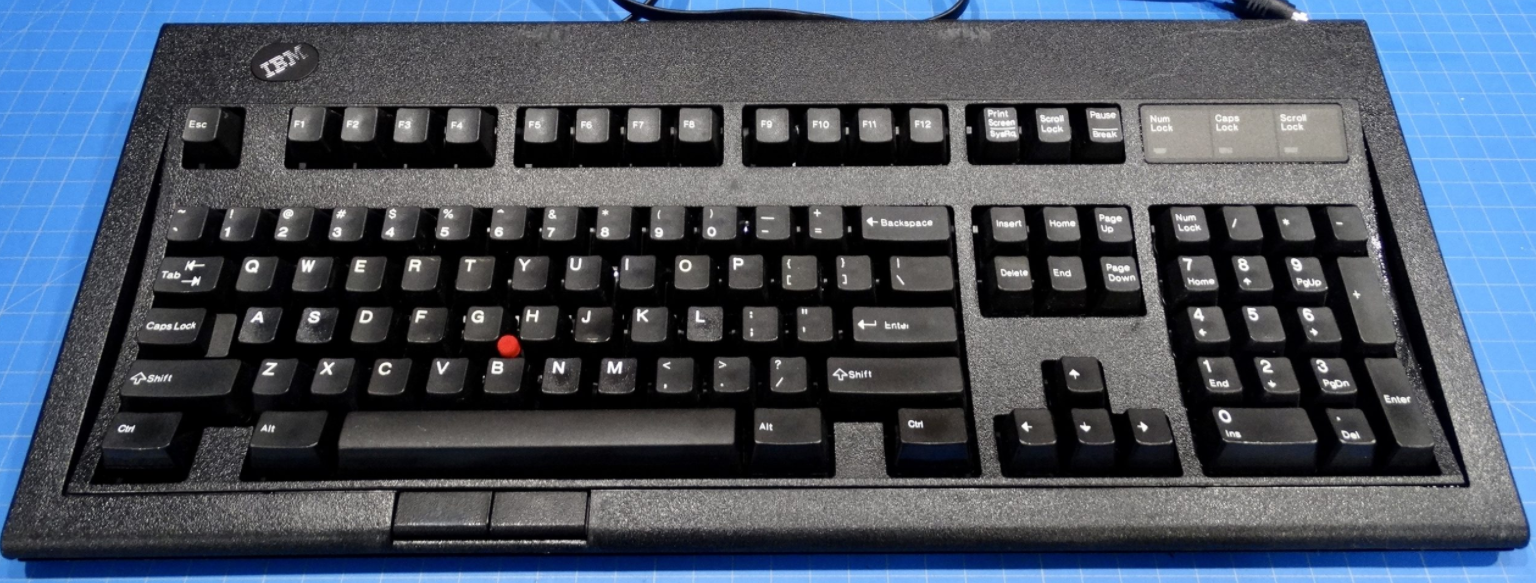
I watched a video today by Dave Plummer of Dave's Garage and listened to him talk about his IBM Model-M Keyboard. He liked it (as do I), however it's not super useful in 2022 for two reasons:
1. It's only a 101-key keyboard (noticably absent the Windows keys), and
2. It is not USB-Compatible.
Now, after that video I jumped on the Dave's Garage discord to mention to Dave that a company called Unicomp still makes the genuine Model M keyboard, as well as others of that kind, including a 104-key version of the Model M with USB interface.
I was discussing keyboards with some of the forum members when a user named @micon mentioned that he had an IBM M13 keyboard with the PS2 interface but the cable he had was perished and unusable.
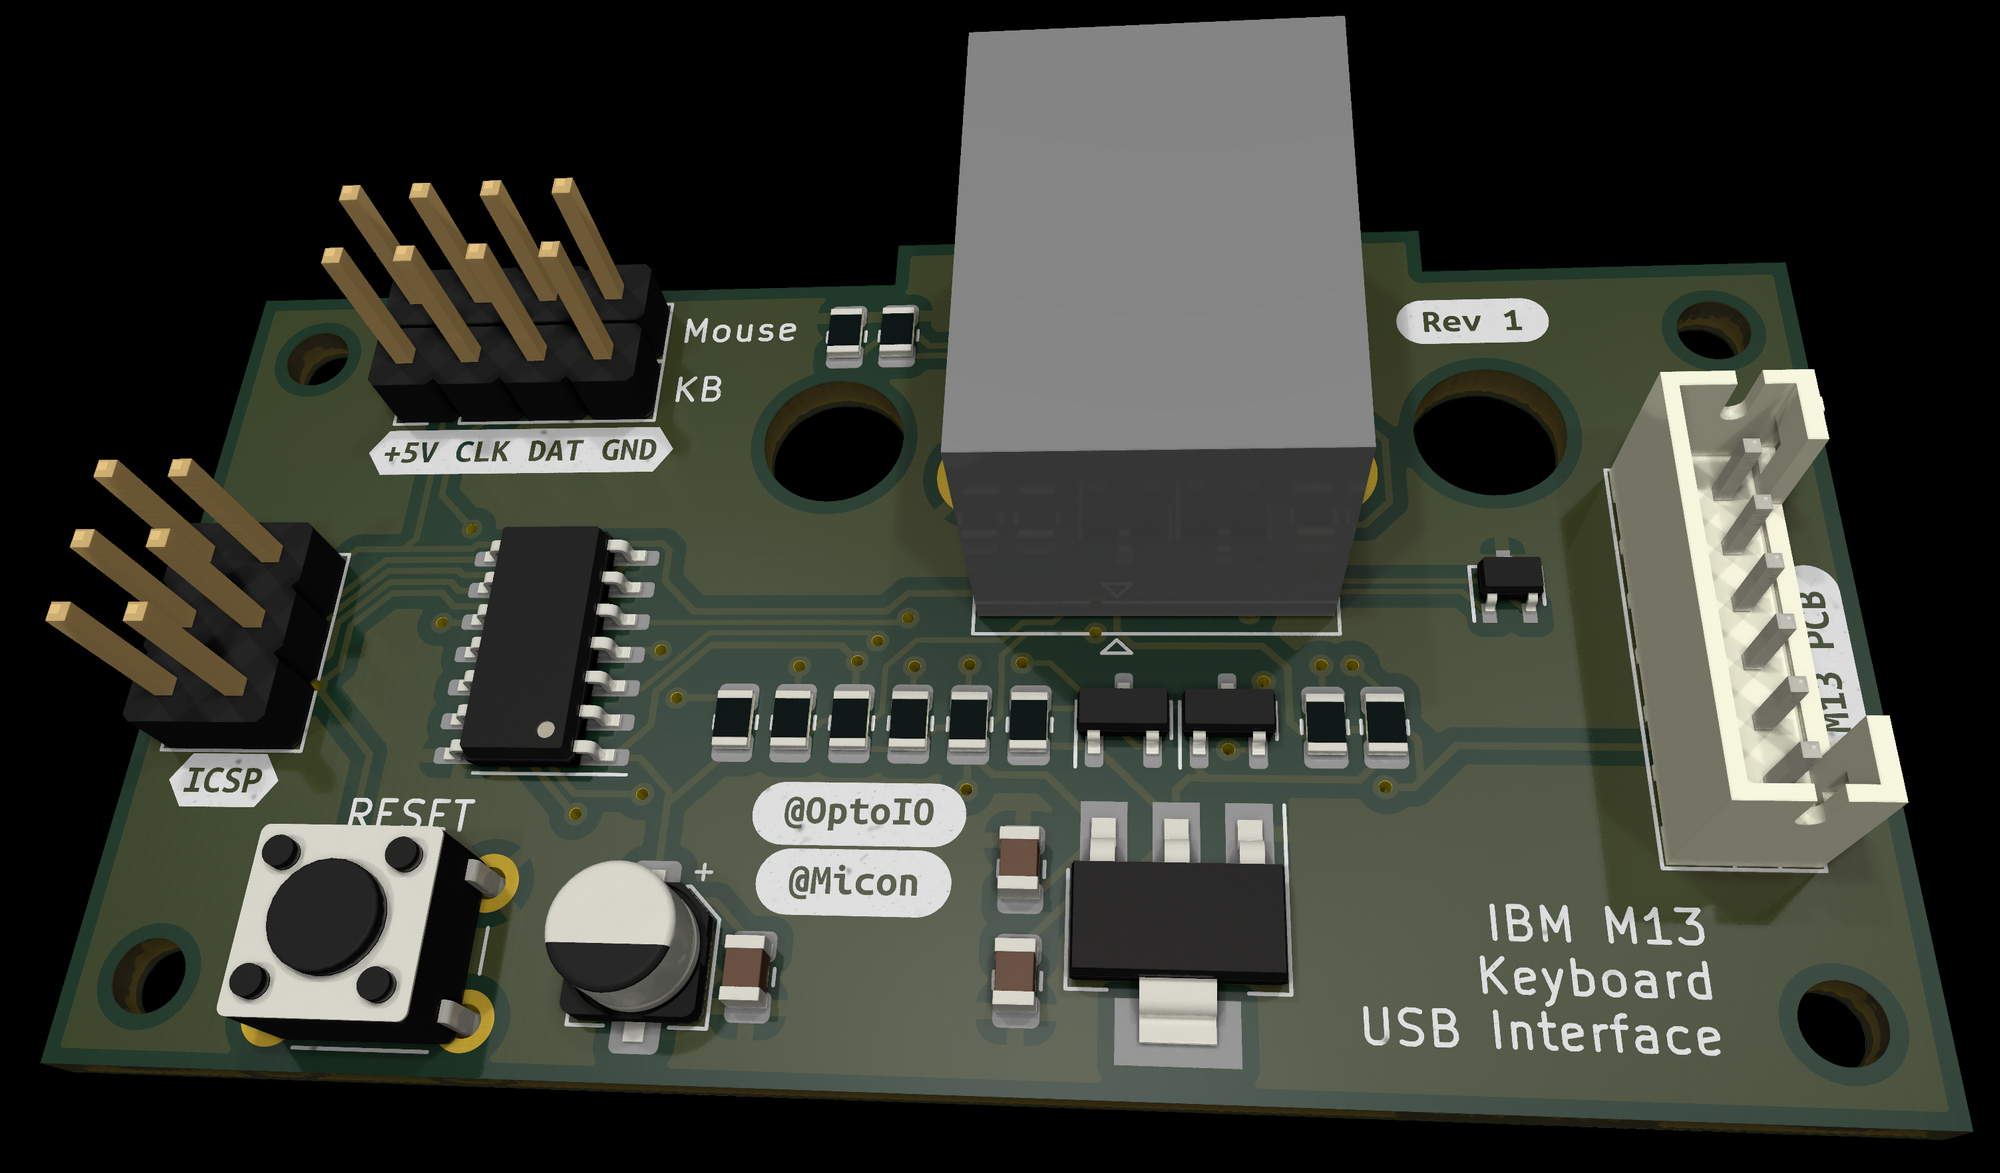
Me, never not on the lookout for an opportunity to design something, whether needed or not, worked with @micon to design a module that could fit snugly in the keyboard, and provide a USB-C interface directly into the Keyboard/Mouse module.
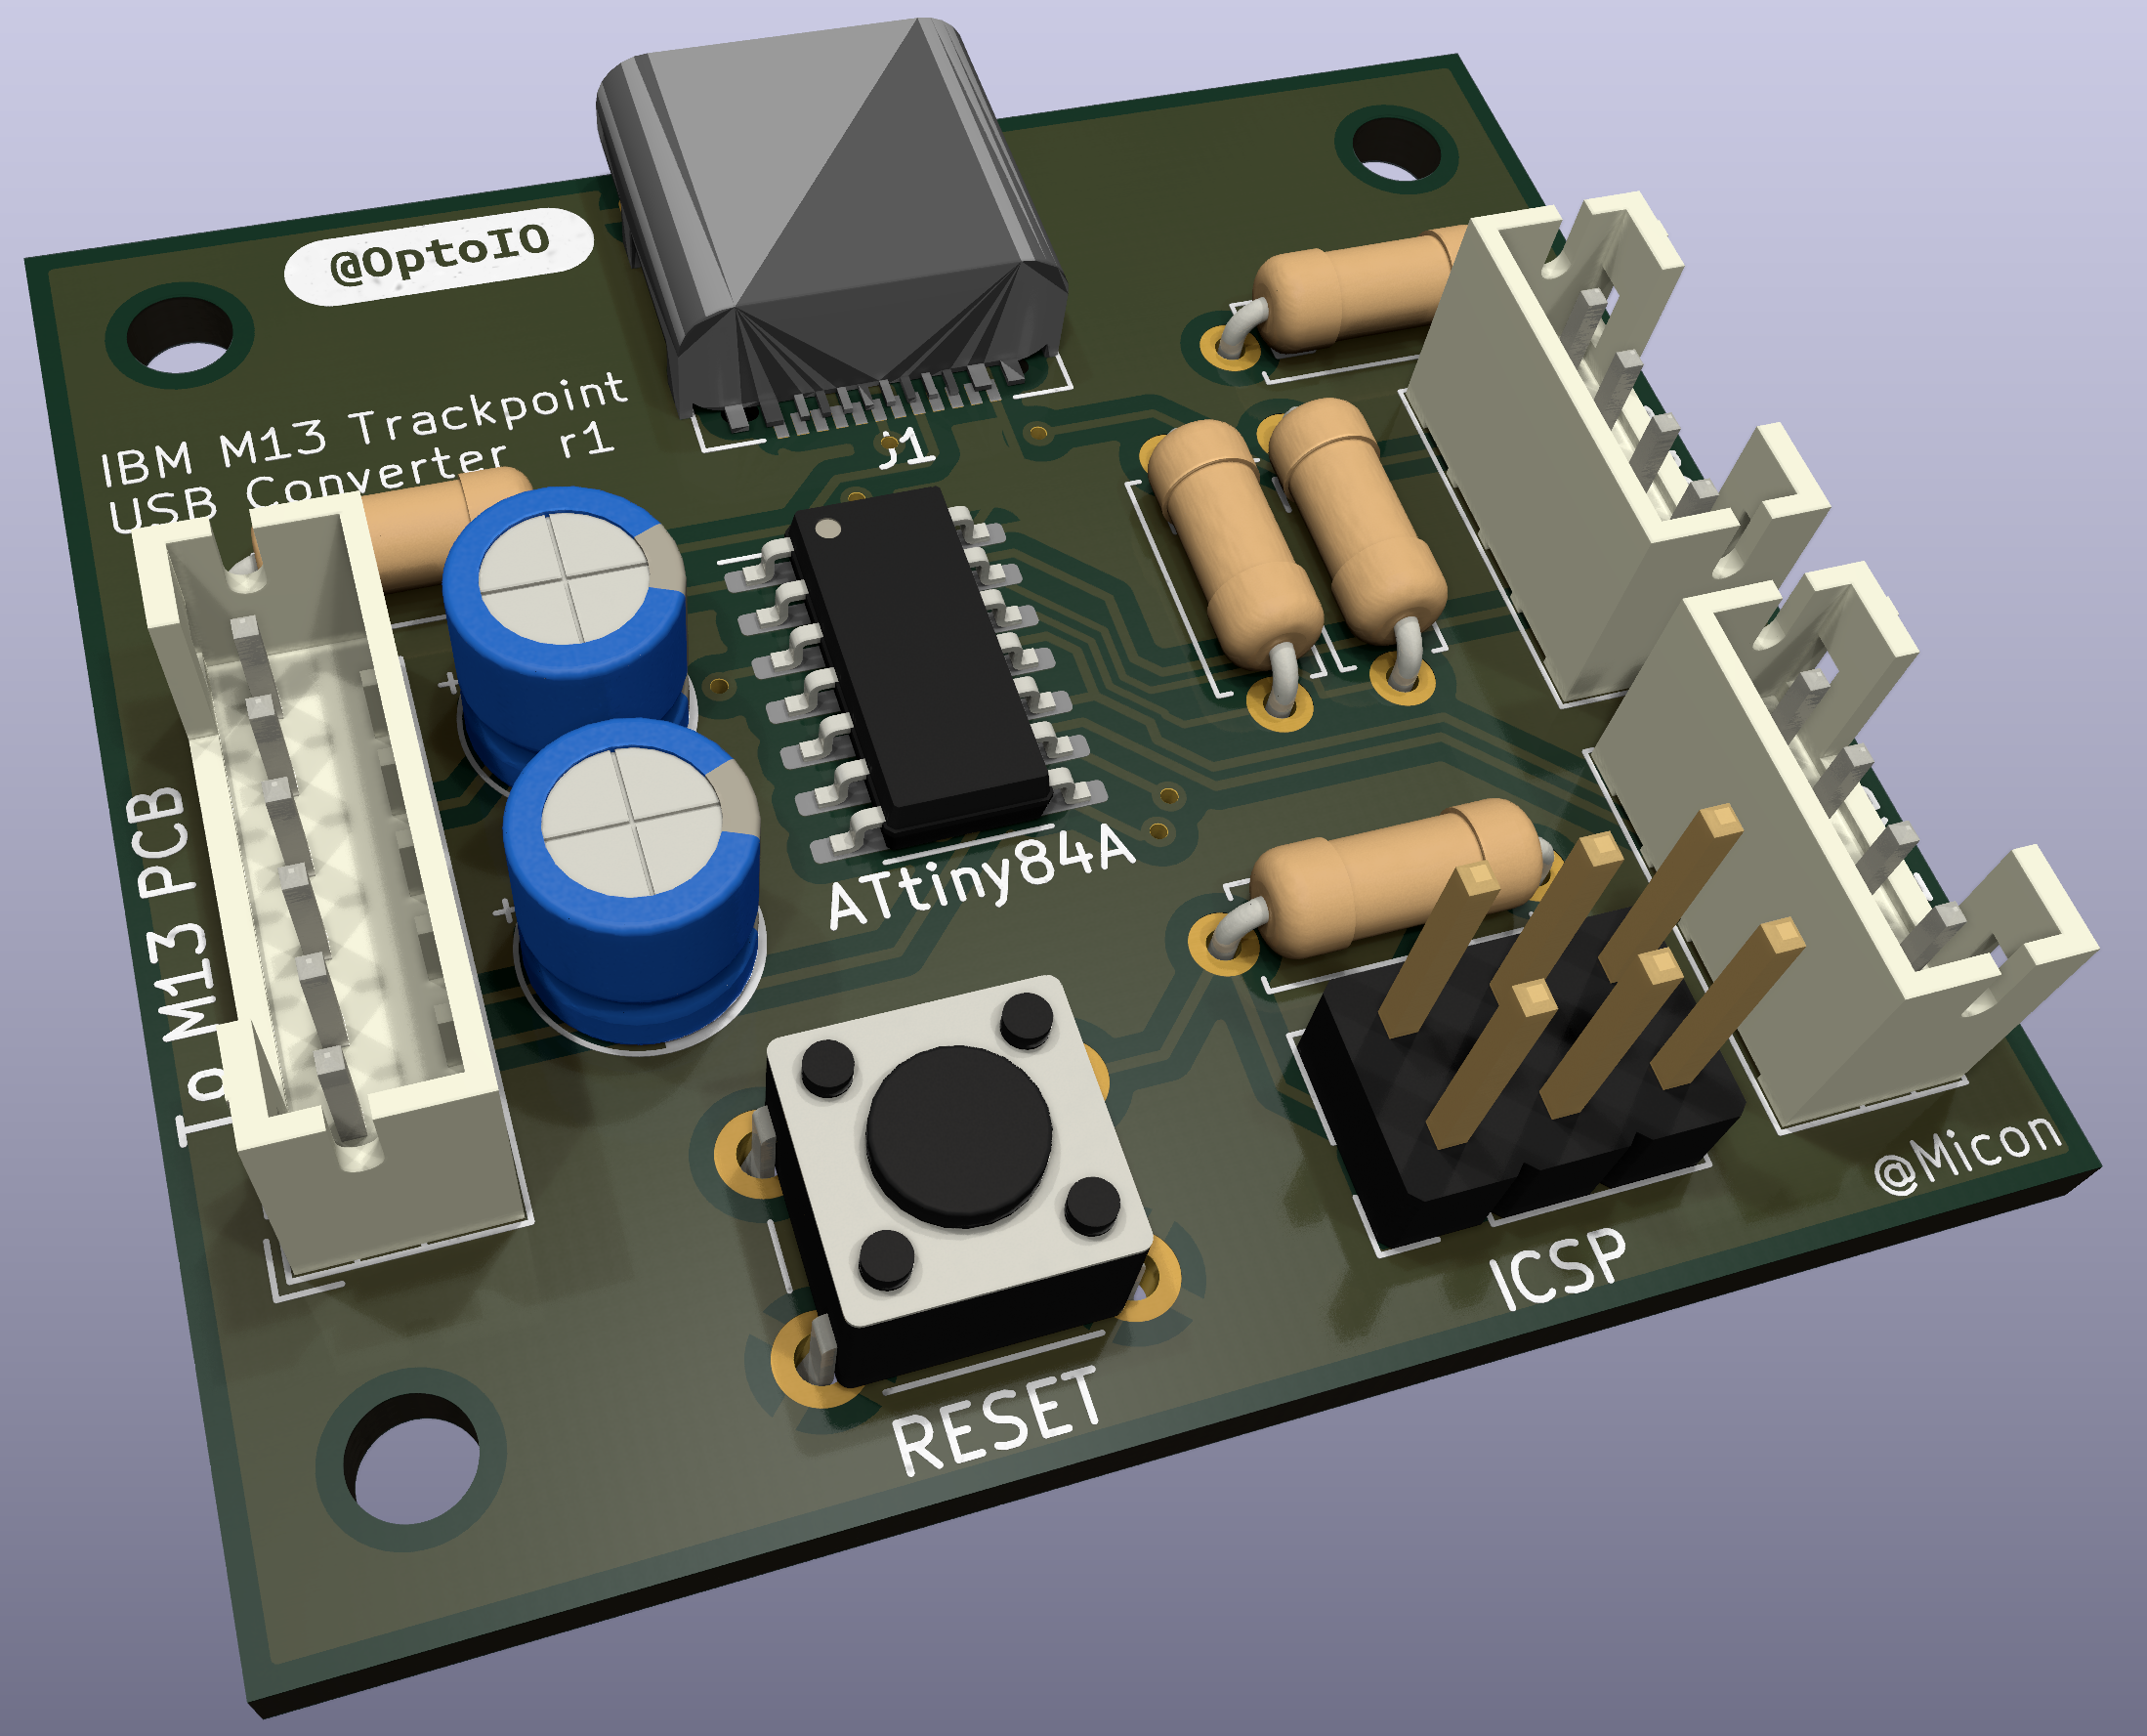
Powered by an ATTiny84A IC, and built with almost entirely throughhole parts to allow for easy assembly, and to fit in with the aesthetic of the vintage keyboard.
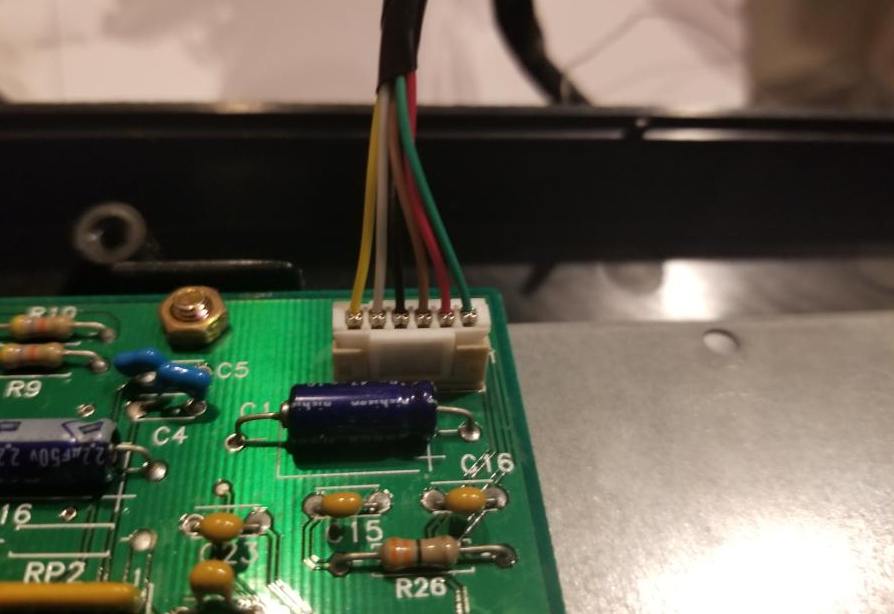
The board was designed to sit right next to the existing board in the keyboard and use a 6-pin JST connector to connect the built in controller directly to the new module. This makes installing the module a breeze.
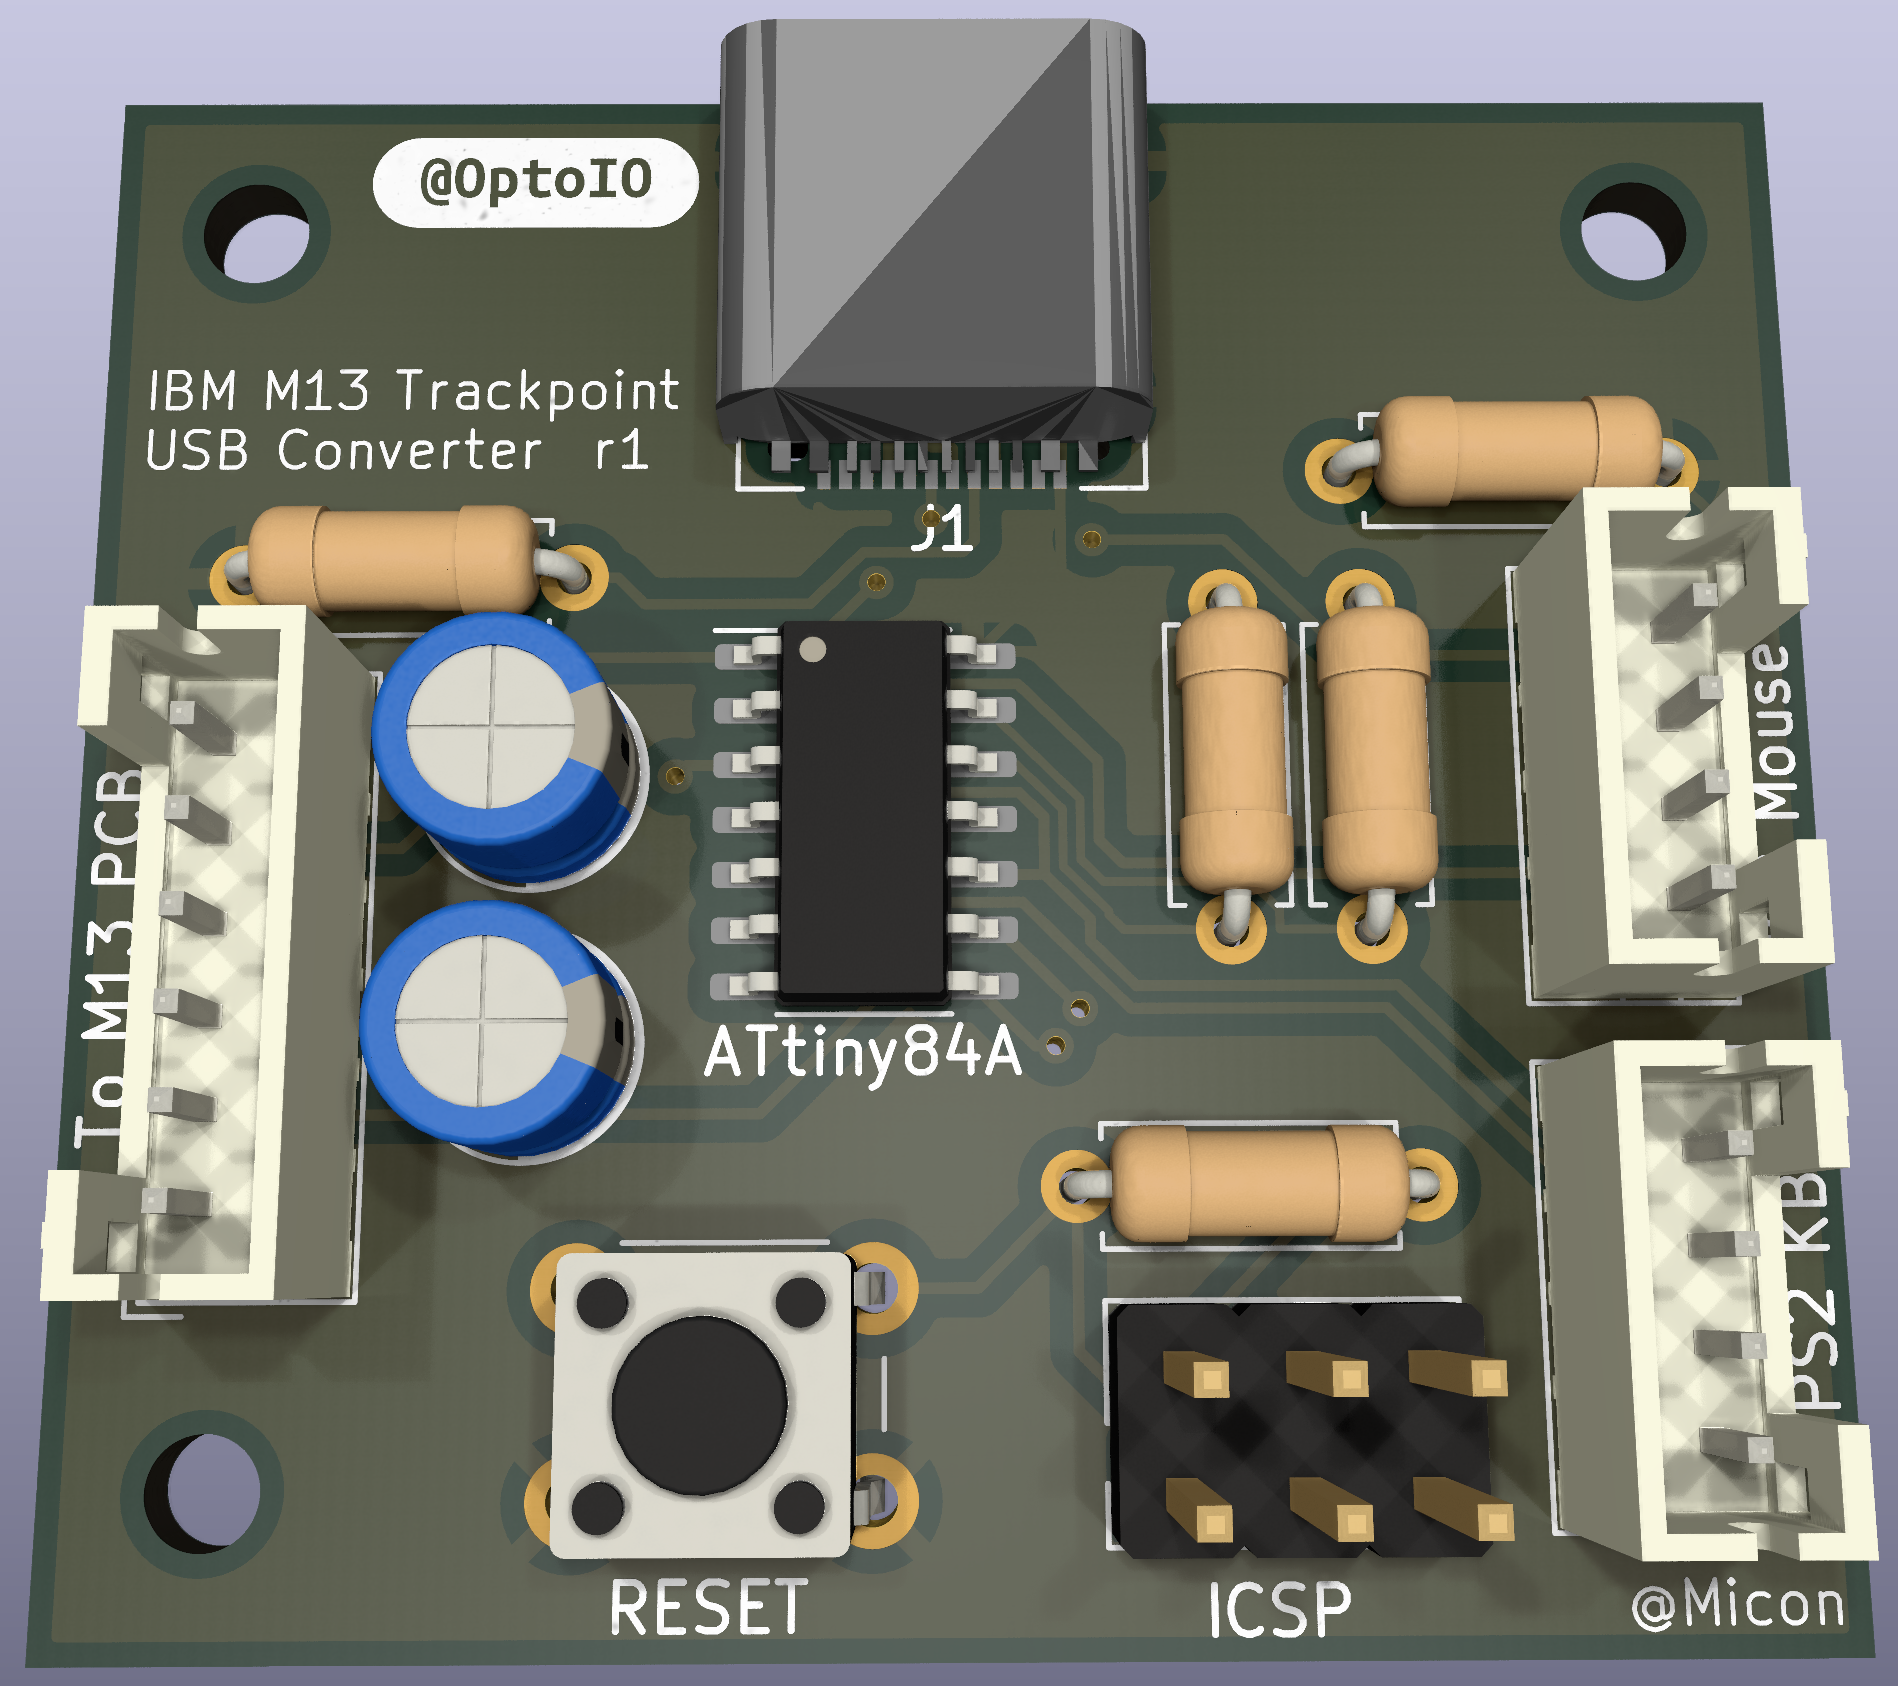
Designing the board, I added an optional PS/2 Keyboard and PS/2 Mouse output connection just in case you wanted to leave the existing cable in place and still provide a USB input and to allow the board to be multi-functional.
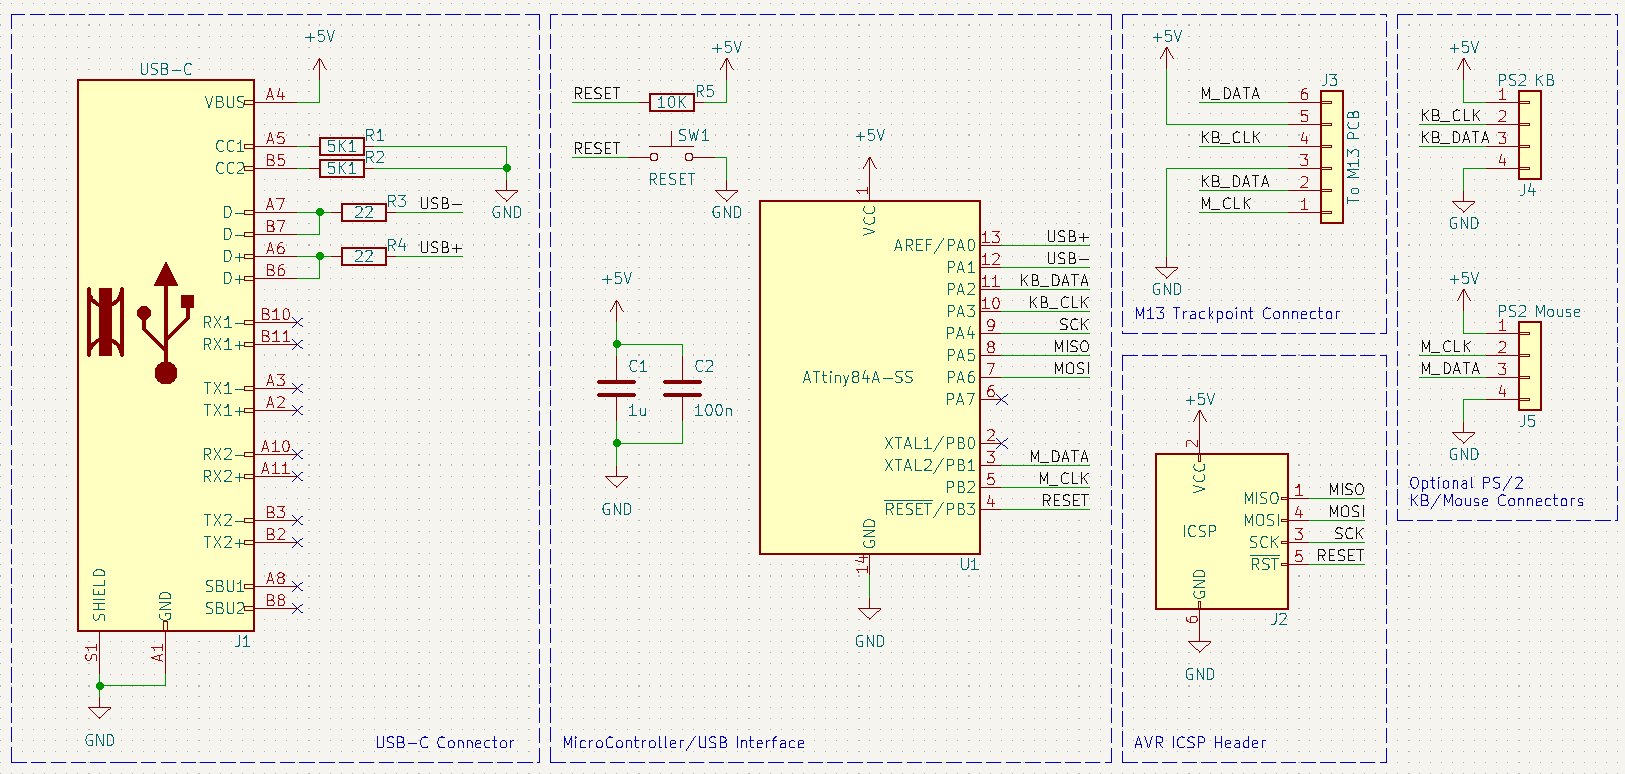
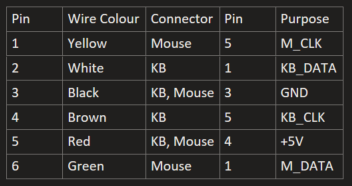
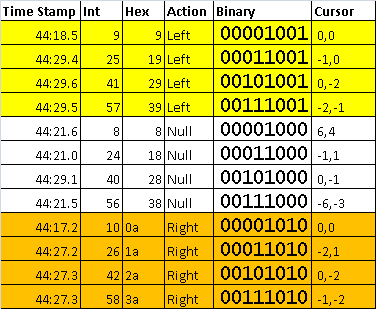
The only challenge we had was working out the Pinout and after a bit of reverse engineering, we managed to ascertain the following pinout for reference.
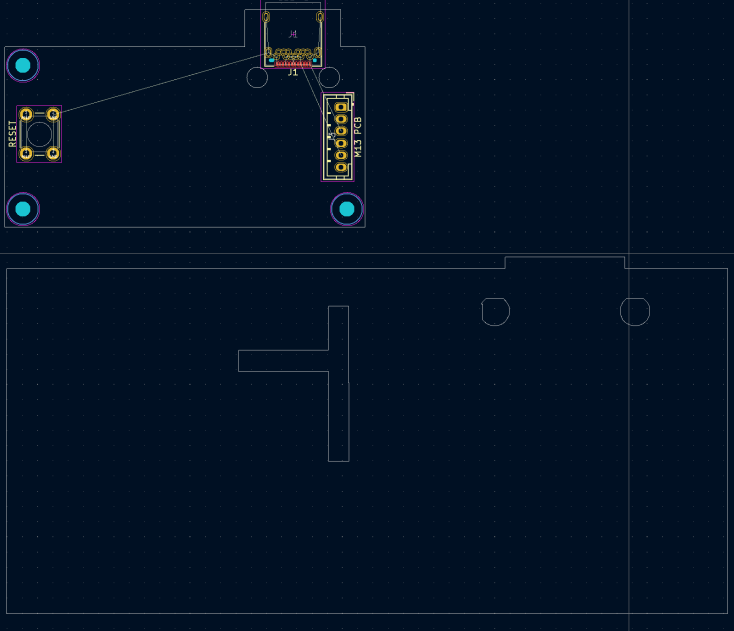
Some more effort will need to go into the design to make it fit perfectly into the keyboard (I don't actually own one myself so will need to do a bit of trial an error to line up mounting holes and connector positions. Not a big deal.
Software wise, I will work on that in the next few weeks. The nuts and bolts of it will be:
1: Arduino-based,
2: USB HID Library for providing the USB interface, and
3: PS/2 Library to allow for the translation of the Keyboard/Mouse commands
Once written, there should be very little reason to ever update it so an Over the Wire USB flashing is probably overkill, but I might look at that down the track. If need be, the built in AVRISP Programming header should be more than sufficient.
If the board works as well as hoped; I will respin an updated version with SMD components instead of through-hole and sell them on Tindie in case there's a market for them. No idea how many people might want them, but I figure there has to be more than just one out there.
I'll also make this design and source code Open Source for others to review and build upon.
Github: https://github.com/optoisolated/m13-trackpoint-usb-converter/
Update 2
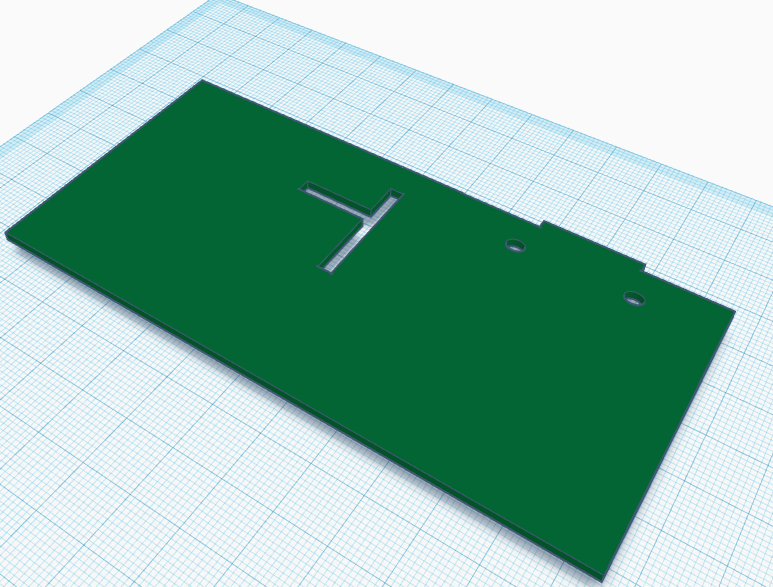
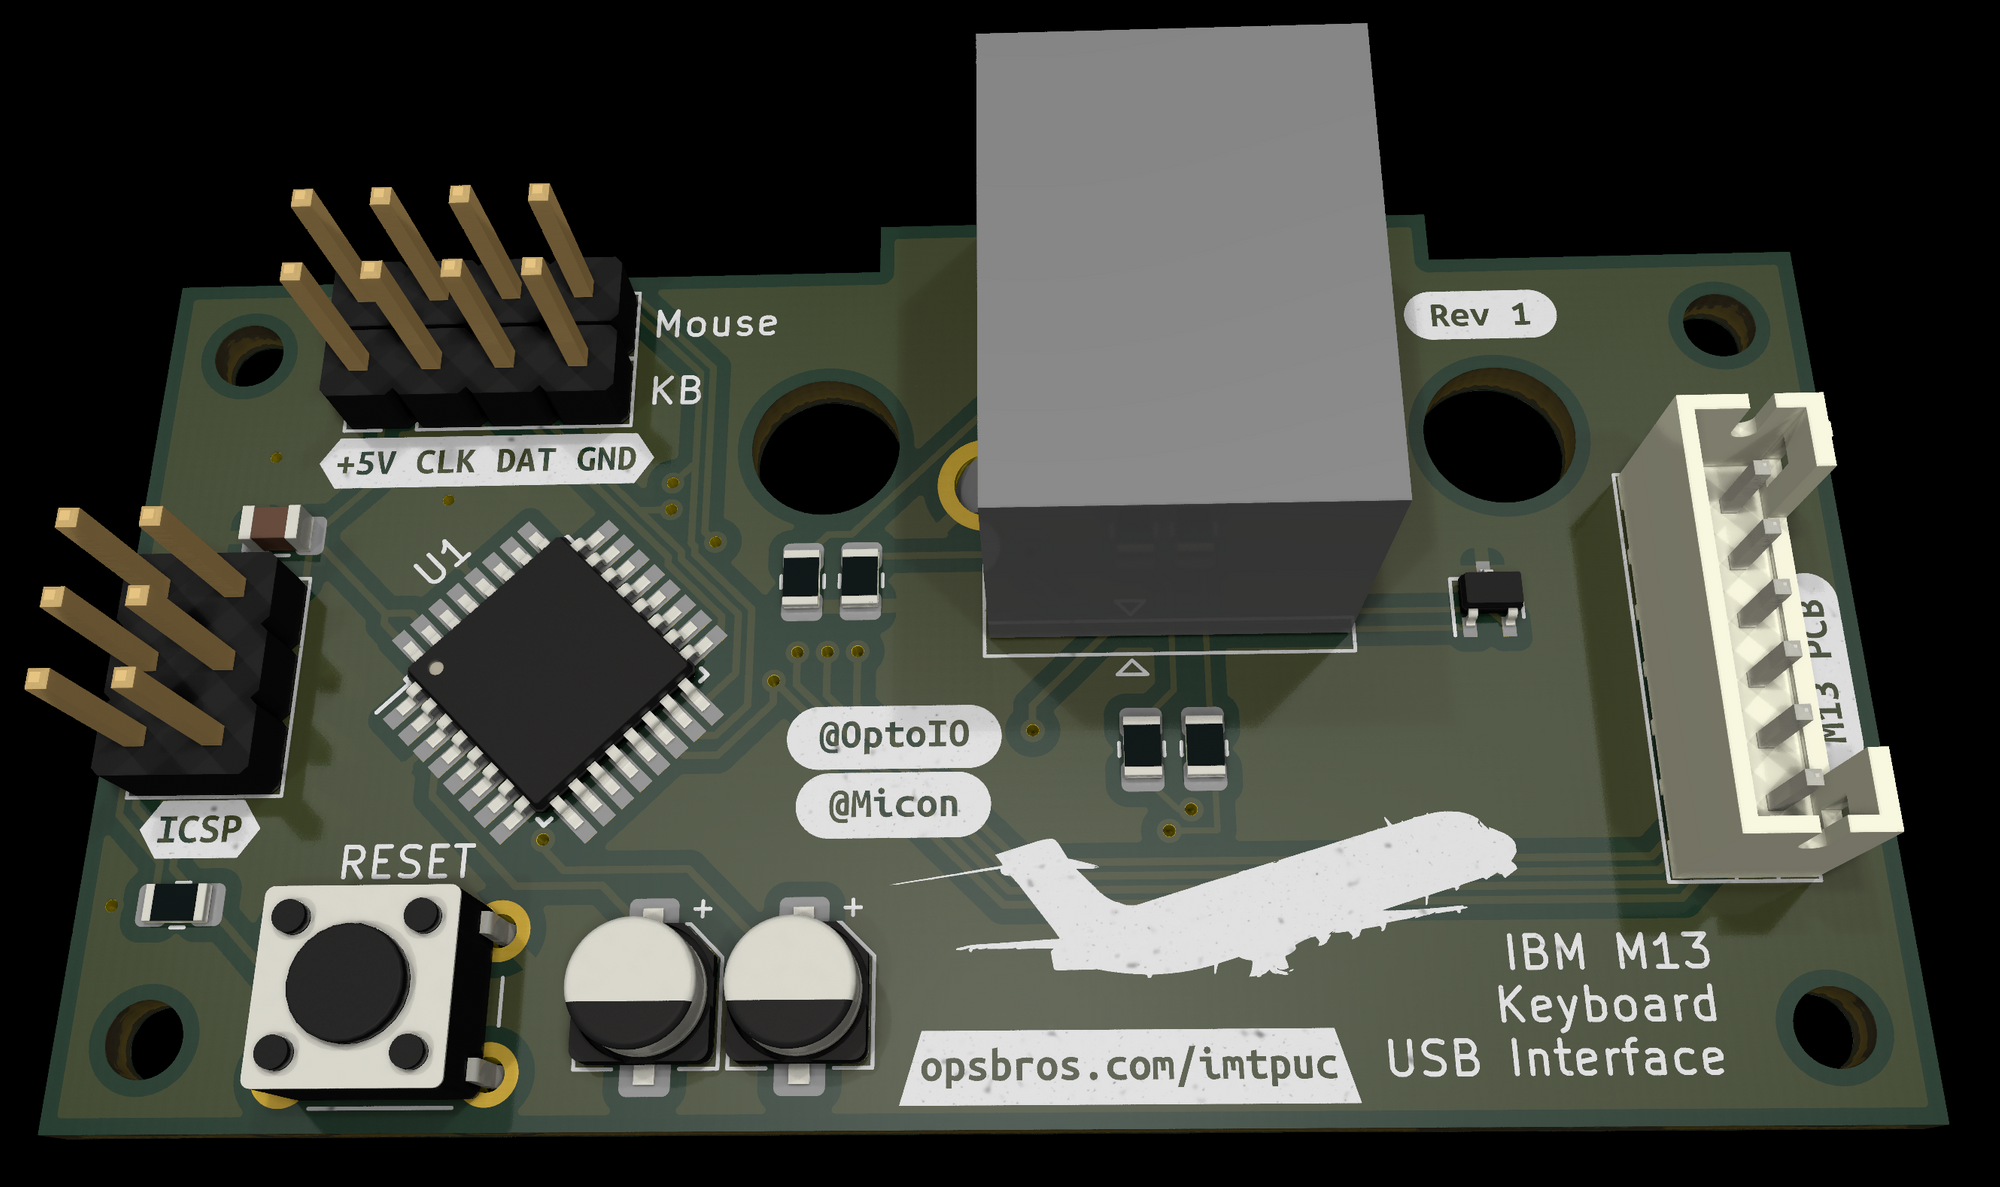
So after about 5 or 6 different revisions, I finally settled on a board layout. Micon was able to cad out a region inside the keyboard suitable for the module to sit, including a spot that already has a cutout where the USB port can reside, and some supporting posts that can hold the board in place.
The new board layout has both a USB-C and USB-B connector, however they are stacked, so that when the board is assembled, you can choose to assemble it as USB-C or USB-B, but not both. This simplifies the layout somewhat. I am still not happy with the USB-C footprint but for now it wont be used so that's not a showstopper.
This layout implemented the USB connection properly, not as described in the V-USB specification, by utilising a high-speed bidrectional logic level converter. This required the addition of about 6 passive components, 3 N-channel MOSFETs and an LDO to generate the 3.3V required.
Later, I moved away from the ATTiny with the V-USB library. Using that library didnt fully meet the USB specification in terms of voltage levels etc, and getting the libraries to work reliably with Arduino proved challenging. Additionally, the part was not available anywhere.
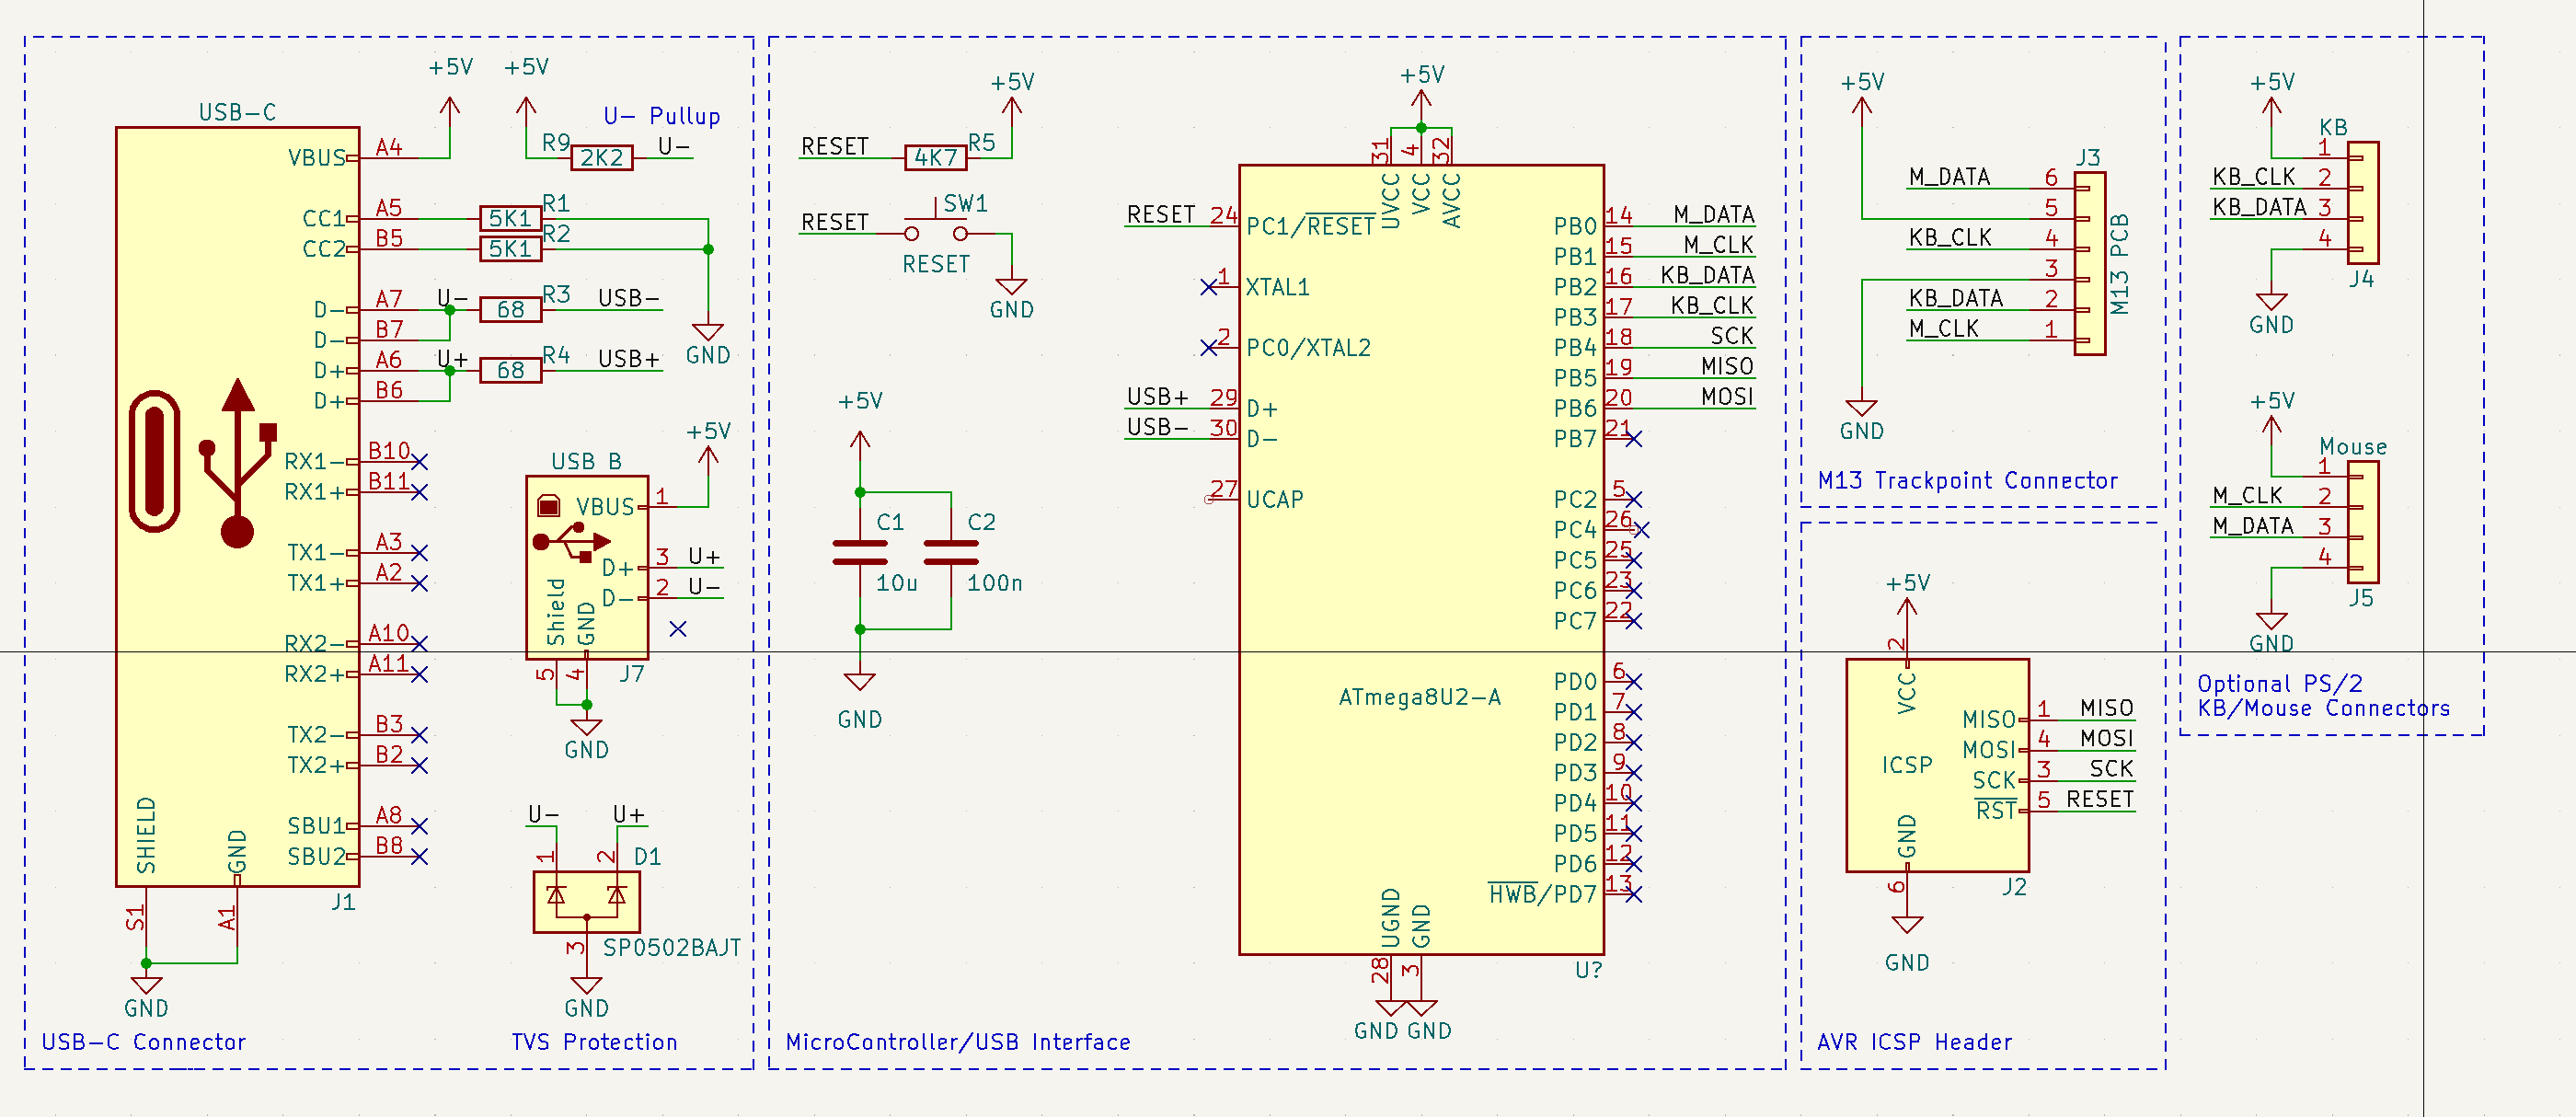
A parametric search on Digikey later, and I came across the ATMega8U2, which is massively overkill for what we're using it for, but it has one major advantage; it has a native USB bus connection. Fully compliant USB Bus! Winning. It also means I coul ditch about 13 parts required to handle the USB bus voltage conversion.
8 pasives, and a TVS diode for input protection; Thats's all thats needed to use this part. I love it.
The board has now been sent to JLCPCB for manufacture and when it arrives, follows the fun job of trying to reflow-solder this board.
While working through this design process, Micon and I also worked to verify that the keyboard and trackpoint input was indeed true PS/2 and able to be interfaced and translated. After troubleshooting some issues with reversed pins, we were able to confirm receiving keyboard scan codes and trackpoint inputs. This confirmed to us that the PS2 libraries we used will work correctly and provide the data we need.
I have started working on adapting a USBHID library to provide the translated Keyboard and Mouse commands to the computer as a standard USB HID input device. This means no special drivers are required. YAY!
The next steps will be developing the code to allow this to work when the boards arrive and are assembled. I added some headers on the board to allow for me to test PS/2 inputs without the M13 keyboard so I can confirm the library works before shipping the board to Micon for the final testing.
Stay tuned...