Docker and CumulusMX
I wanted to find out if I could successfully redeploy my Weather Station monitoring software into a Docker container. Let's battle the elements together...

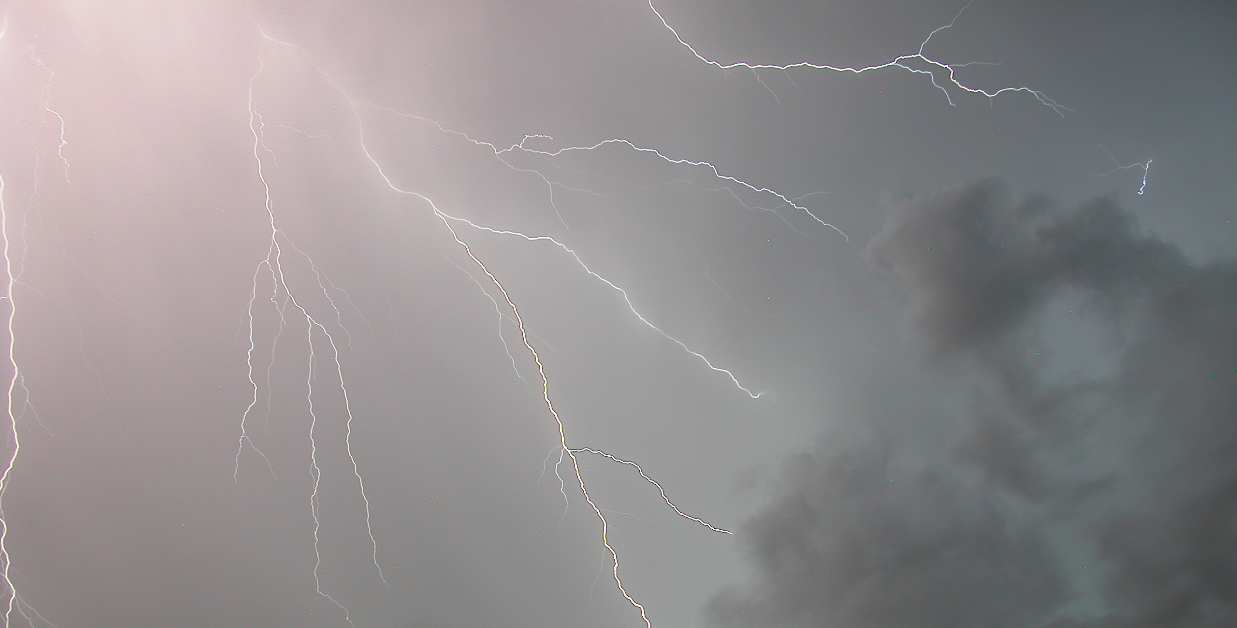
I've been an avid weather enthusiast ever since I discovered you could detect lighting using a untuned AM radio. That distinctive pop sound you hear when lightning is nearby was enthralling to me, and ever since I've been interesting in not only witnessing weather, but measuring it.
For many years, I've used one of those somewhat basic, but quite accurate FineOffset WH3020 weather station units, which consist of an outside base station containing an anenometer (wind speed/direction), temperature, humidity and barometric pressure sensors, not to mention the solar radiation detector. The data is transmitted to the base station and displayed on the LCD display. Awesome! Well now we have all this data, it seems to keep it to myself..
Enter, Cumulus.
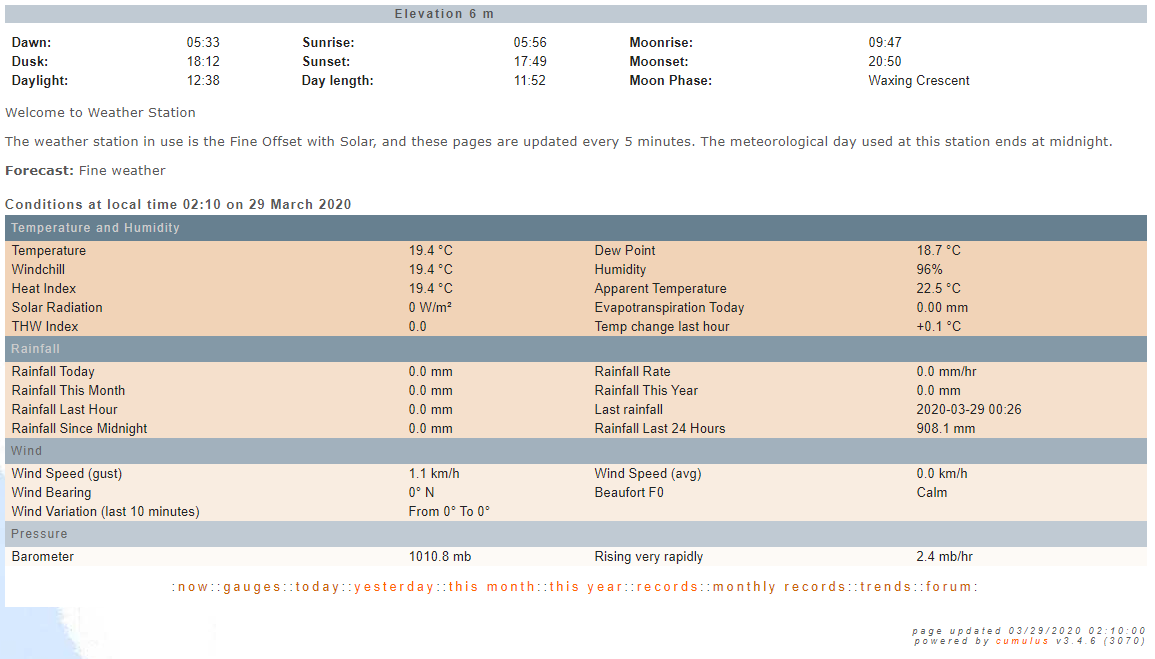
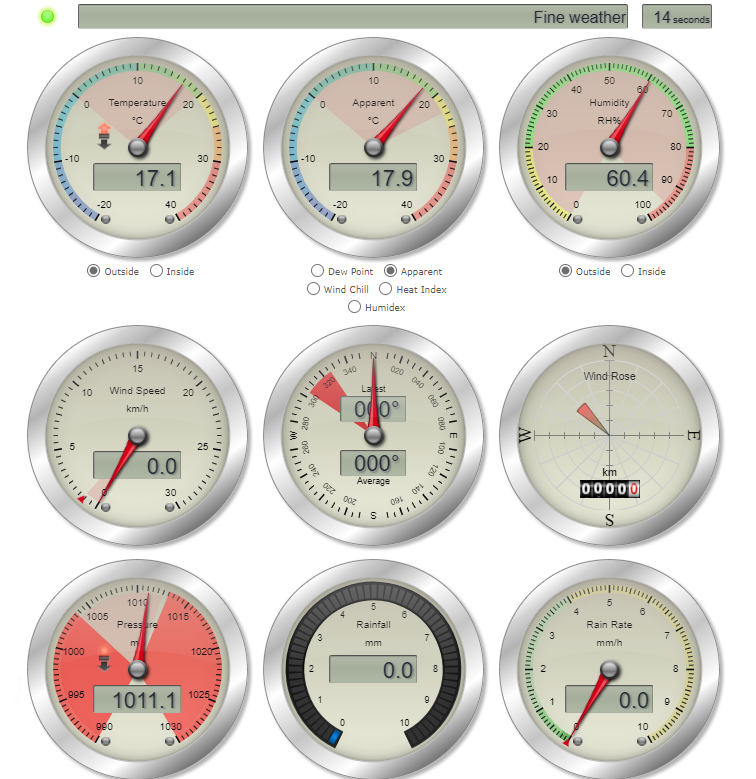
SandySoft Cumulus is probably the most popular weather station data collection and presentation software going and I've been using it for about as long as I've had this weather station, mostly because it works extremely well and conveniently generates the data needed to publish the weather data as a website. Beautiful.
Recently, the codebase was rebuilt to run on .NET so it can be truly cross platform. Now I can run it on a Raspberry Pi instead of a dedicated Windows PC. But... Can we take it further? Could we bring this amazing tool into the 21st century and run it in a docker container? Behold, Cumulus MX
The short answer is Yes... But with a painful yet tolerable gotcha.
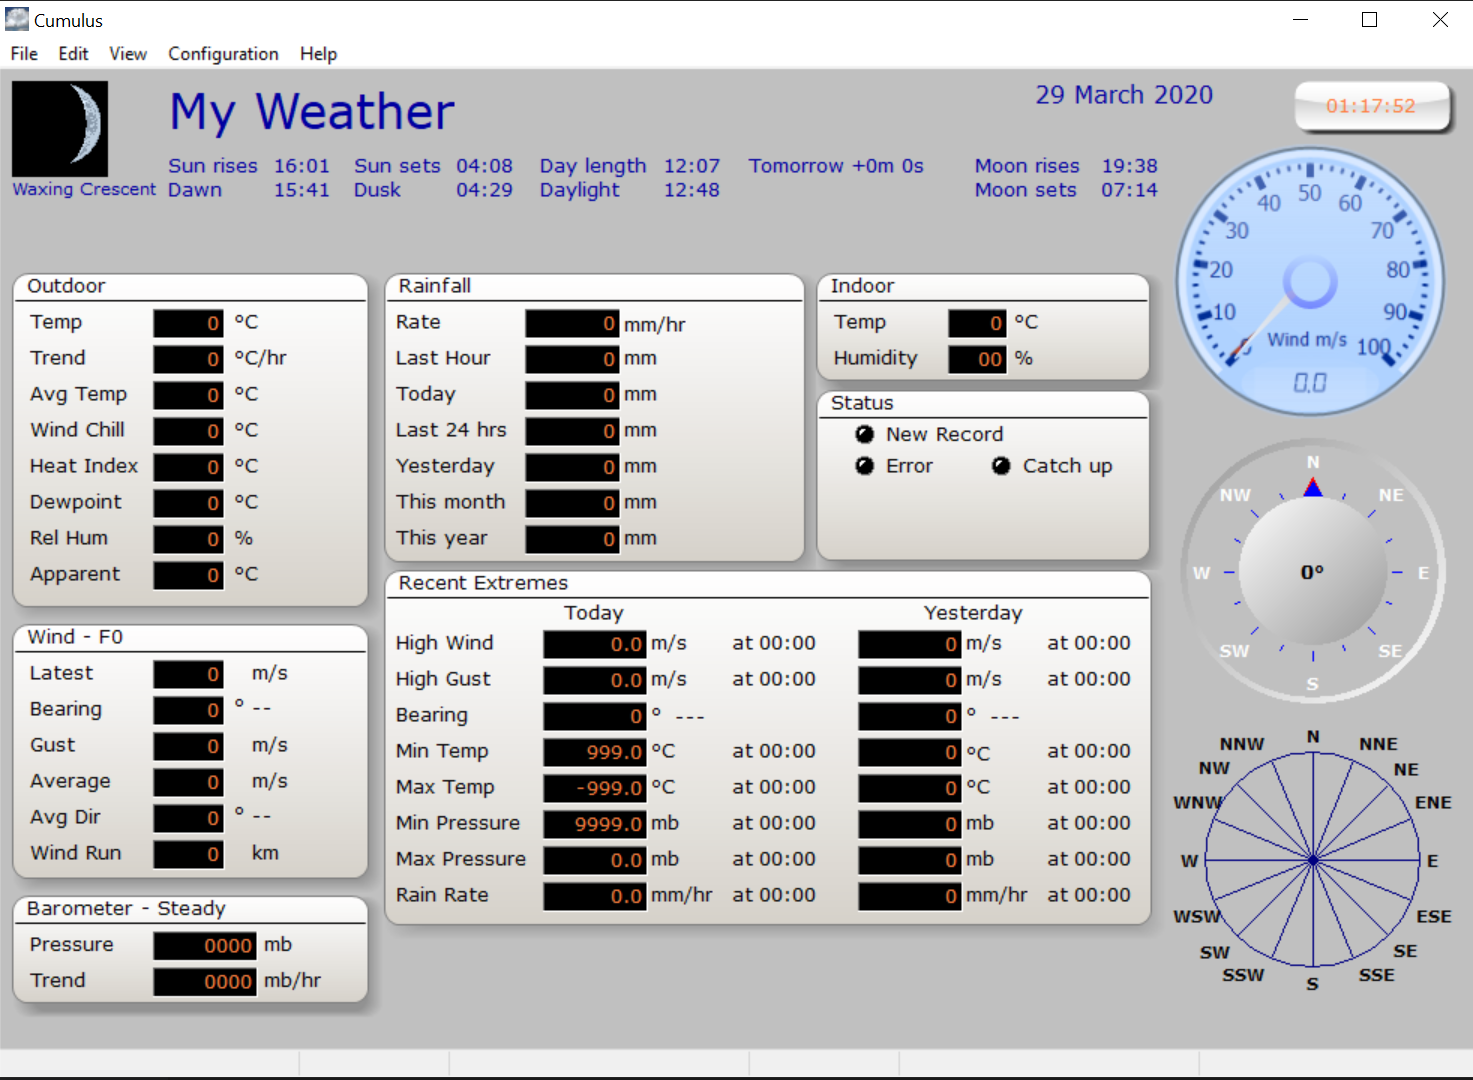
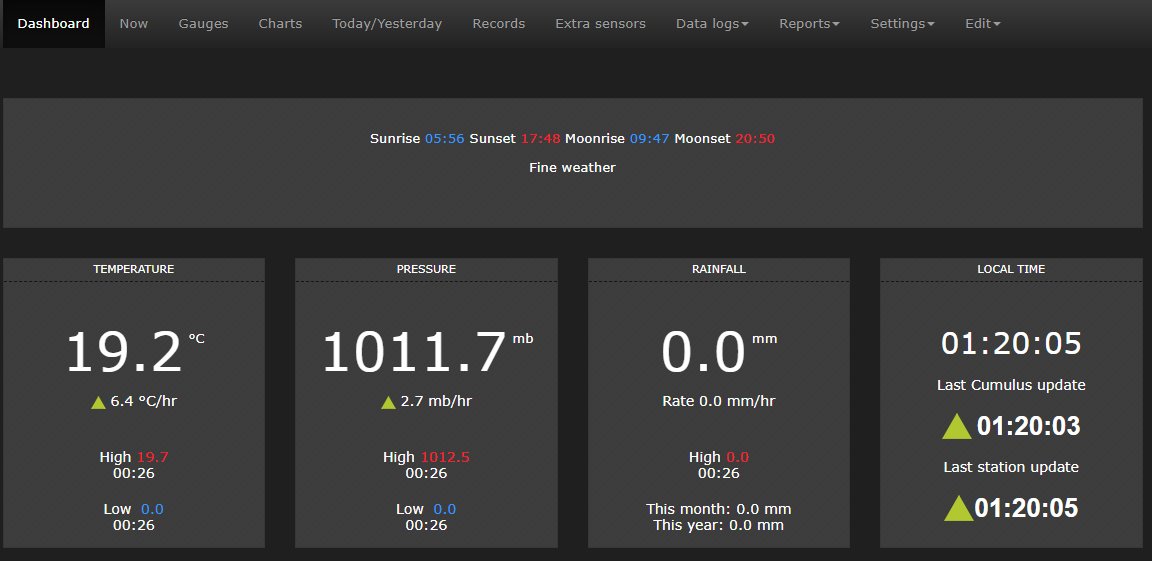
MX with its new codebase ditched the WinForms interface and went straight to an administrative Web Front-end. It's very early in its development but it works surprisingly well, and I definitely prefer this over the old software.
I've had this running on a Raspberry Pi for quite some time, however I decided as now that I have a dedicated host for running Docker containers, it was high time that CumulusMX met Docker.
Step 1: Downloading the latest CumulusMX build.
This step I thought would be the easiest, but it was not to be. Turns out that while the repos are easily accessible on their Github repository, the naming convention of their releases includes the version number in the ZIP file, meaning we would have to get all 'sed' on it's ass to get the file automatically, consistently.
LATEST_RELEASE=$(curl -L -s -H 'Accept: application/json' https://github.com/cumulusmx/CumulusMX/releases/latest) && \
  LATEST_VERSION=$(echo $LATEST_RELEASE | sed -e 's/.*"tag_name":"\([^"]*\)".*/\1/') && \
  CUMULUS_ZIP="CumulusMXDist${LATEST_VERSION:4,1}.zip" && \
  ARTIFACT_URL="https://github.com/cumulusmx/CumulusMX/releases/download/$LATEST_VERSION/$CUMULUS_ZIP" && \
    wget $ARTIFACT_URL -P /tmp
This code will grab the releases page and identify the version of the 'Latest' tagged release. From there, it will build the ZIP file name, and pass that to the ARTIFACT_URL, which can then be used to fetch the file. It then simply unzips it into the /opt/CumulusMX folder, and voila; That's done..
Step 2: Install nginx
This was easier to do as most of the needed info was already available. I add the ppa:nginx repository, run the update, and then apt-get install the nginx library. There's a little bit of admin work later on to get it all working, but we will get to that in a moment.
  apt-get update && \
  apt-get install -y software-properties-common && \
  add-apt-repository -y ppa:nginx/stable && \
  apt-get update && \
  apt-get install -y nginx && \
  rm -rf /var/lib/apt/lists/* && \
  echo "\ndaemon off;" >> /etc/nginx/nginx.conf && \
    chown -R www-data:www-data /var/lib/nginx
Step 3: Timezone
TIL that Docker doesn't inherit the timezone of the host PC. Good to know. So we need to install TZData and configure it. Annoyingly when you install this role, it prompts you to configure it, making it harder to automate, but there's ways around that... Seeing as I was doing this part first, I added all of my install libraries here also.
# Install Packages
RUN \
  apt-get update && \
  apt-get install -y mono-complete wget curl tzdata unzip libudev-dev git python-virtualenv

# Configure TZData
    RUN ln -snf /usr/share/zoneinfo/$TZ /etc/localtime && echo $TZ > /etc/timezone
Step 4: Export Config and Data files
To allow the CumulusMX data and configuration files, logs, etc to survive docker container rebuild, they need to be mounted outside of the container. This done by 'exporting' the folders. This is pretty easily done with the use of a few -v /host/folder:/docker/folder lines in our run statement and the following lines added to the Dockerfile:
VOLUME ["/opt/CumulusMX/data","/opt/CumulusMX/backup","/opt/CumulusMX/Reports","/var/log/nginx","/dev"]
With this line in place, the MX Data, Backup and Reports folders are exported, and the nginx log folder is also exported. To map these when the docker container, we run the docker run command with the following parameters:
    -v /opt/MXWeather/data:/opt/CumulusMX/data && \
    -v /opt/MXWeather/backup:/opt/CumulusMX/backup && \
    -v /opt/MXWeather/log:/var/log/nginx && \
    -v /opt/MXWeather/Cumulus.ini:/opt/CumulusMX/Cumulus.ini
Did you notice the last one? Yes, that's right, annoyingly the config file is in the root folder instead of a more traditional ./config folder. No matter, fortunately Docker lets you export a single file, however you have to make sure that the file already exists in the host location, or else when it's mapped, Docker will map it as a folder. Not very useful. A simple touch can fix it...
touch /opt/MXWeather/Cumulus.ini
Step 5: Configure nginx
This turned out to be relatively easy once I figured out which folder actually held the web files. The CumulusMX folder contains a /web and /webfiles folder with data in them. As the actual publishing HTML files don't appear until MX has been running for a while and generated them based on incoming data, I wasn't sure which folder they went into. I guessed /webfiles. I was wrong.
I generated an nginx site configuration file which was injected into the Docker container to provide the necessary configuration elements to allow nginx to publish the /web folder on port 80.
server {
    listen 80;

    root /opt/CumulusMX/web;
    index index.htm

    # log files
    access_log /var/log/nginx/MXWeather.access.log;
    error_log /var/log/nginx/MXWeather.error.log;

    location = /favicon.ico {
        log_not_found off;
        access_log off;
    }

    location = /robots.txt {
        allow all;
        log_not_found off;
        access_log off;
    }

    location ~* \.(js|css|png|jpg|jpeg|gif|ico|svg)$ {
        expires max;
        log_not_found off;
    }
}
I also used a generic nginx.conf root configuration file and prepared it for working with the Cumulus web service. I didn't need to change a lot in this file, but it meant it could be customised prior to build, if needed.
user www-data;
worker_processes auto;
pid /run/nginx.pid;
include /etc/nginx/modules-enabled/*.conf;

events {
        worker_connections 768;
}

http {
        sendfile on;
        tcp_nopush on;
        tcp_nodelay on;
        keepalive_timeout 65;
        types_hash_max_size 2048;

        include /etc/nginx/mime.types;
        default_type application/octet-stream;

        ssl_protocols TLSv1 TLSv1.1 TLSv1.2; # Dropping SSLv3, ref: POODLE
        ssl_prefer_server_ciphers on;

        access_log /var/log/nginx/access.log;
        error_log /var/log/nginx/error.log;

        gzip on;

        include /etc/nginx/conf.d/*.conf;
        include /etc/nginx/sites-enabled/*;
    }
A few other housekeeping tasks were completed such as copying the deployment files into the /web folder, enabling the nginx site, uploading the Start script etc which are shown here. It also shows the ports that were exposed and the volumes that require external mounting:
# Copy the Web Service Files into the Published Web Folder
RUN cp -r /opt/CumulusMX/webfiles/* /opt/CumulusMX/web/

# Define mountable directories.
VOLUME ["/opt/CumulusMX/data","/opt/CumulusMX/backup","/opt/CumulusMX/Reports","/var/log/nginx","/dev"]

# Test File
COPY ./index.htm /opt/CumulusMX/web/

# Add Start Script
COPY ./MXWeather.sh /opt/CumulusMX/

# Add Nginx Config
COPY ./nginx.conf /etc/nginx/
COPY ./MXWeather.conf /etc/nginx/sites-available/
RUN ln -s /etc/nginx/sites-available/MXWeather.conf /etc/nginx/sites-enabled/MXWeather.conf && \
  rm /etc/nginx/sites-enabled/default

WORKDIR /opt/CumulusMX/
RUN chmod +x /opt/CumulusMX/MXWeather.sh

CMD ["./MXWeather.sh"]

# How to bail
#STOPSIGNAL SIGTERM

# Expose ports.
EXPOSE 80 8998
Step 6: USB Passthrough
This turned out to be the place where I sunk most of my time. Reading into Docker about device pass through, it seemed it would be as simple as adding the parameter --device=/dev/usb:/dev/usb to the run command, however it turns out that while MX could see the weather station plugged into the USB port, it couldn't open the data stream. To date I have yet to determine why this is, and after many hours of messing around with different configurations, I ended up removing that line and adding the --privileged parameter instead. It's the brute force fix, which default-maps all of the devices available into the docker container.
Messy, but it works. I will likely have to work with the Cumulus developers to determine why the stream doesn't open and if there is a way to get the USB port passed through without escalating the containers access level.
Privileged Access Fix Update
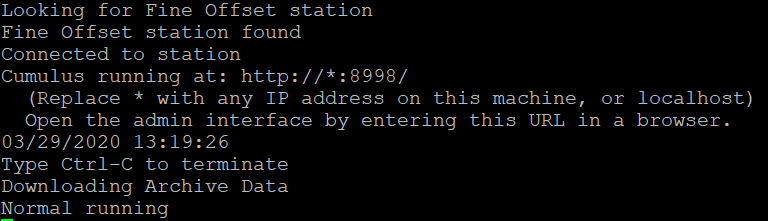
After more frustration and unwillingness to surrender, I started digging into the host dmesg logs, and was able to determine that when the USB device is connected, there are multiple /dev/ device files created.

In the last line of the log dump above, there is an entry for the hid-generic device being added to the /dev pool, with two devices added. Originally I was attempting to use the /dev/usb/hiddev0 device as it was the only one I saw added originally. As the log indicates though, there is also a device added called 'hidraw0' which is mapped as /dev/hidraw0. Updating the docker run statement to reflect this, and removing the --privileged flag (I really didn't like using that to solve the problem) CumulusMX was able to detect the station and communicate with it, without privileged mode. Success!
Step 7: Tidying up
After testing and verification, I completed the code ancillary files and submitted them to GitHub for further improvement and sharing.
https://github.com/optoisolated/MXWeather
This was the final Dockerfile:
#
# MXWeather Dockerfile
#
# https://github.com/Optoisolated/MXWeather
#
# Note: in order to prevent docker from turning Cumulus.ini into a folder, you need to touch it first
# eg. touch /opt/MXWeather/Cumulus.ini
# To build:  docker build -t ubuntu:MXWeather .
# To run:    docker run --name=MXWeather -p 8998:8998 -p 8080:80 -v /opt/MXWeather/data:/opt/CumulusMX/data -v /opt/MXWeather/backup:/opt/CumulusMX/backup -v /opt/MXWeather/log:/var/log/nginx -v /opt/MXWeather/Cumulus.ini:/opt/CumulusMX/Cumulus.ini --device=/dev/hidraw0 -d ubuntu:MXWeather
# Weather data, logs, and settings are persistent outside of the container

# Pull base image.
FROM ubuntu
LABEL Maintainer="Optoisolated"

# Config Info
ARG DEBIAN_FRONTEND=noninteractive
ENV TZ=Australia/Brisbane
SHELL ["/bin/bash", "-c"]

# Install Nginx.
RUN \
  apt-get update && \
  apt-get install -y software-properties-common && \
  add-apt-repository -y ppa:nginx/stable && \
  apt-get update && \
  apt-get install -y nginx && \
  rm -rf /var/lib/apt/lists/* && \
  echo "\ndaemon off;" >> /etc/nginx/nginx.conf && \
  chown -R www-data:www-data /var/lib/nginx

# Install Packages
RUN \
  apt-get update && \
  apt-get install -y mono-complete wget curl tzdata unzip libudev-dev git python-virtualenv

# Configure TZData
RUN ln -snf /usr/share/zoneinfo/$TZ /etc/localtime && echo $TZ > /etc/timezone

# Download Latest CumulusMX
RUN \
  LATEST_RELEASE=$(curl -L -s -H 'Accept: application/json' https://github.com/cumulusmx/CumulusMX/releases/latest) && \
  LATEST_VERSION=$(echo $LATEST_RELEASE | sed -e 's/.*"tag_name":"\([^"]*\)".*/\1/') && \
  CUMULUS_ZIP="CumulusMXDist${LATEST_VERSION:4,1}.zip" && \
  ARTIFACT_URL="https://github.com/cumulusmx/CumulusMX/releases/download/$LATEST_VERSION/$CUMULUS_ZIP" && \
  wget $ARTIFACT_URL -P /tmp && \
  mkdir /opt/CumulusMX && \
  unzip /tmp/$CUMULUS_ZIP -d /opt && \
  chmod +x /opt/CumulusMX/CumulusMX.exe

# Copy the Web Service Files into the Published Web Folder
RUN cp -r /opt/CumulusMX/webfiles/* /opt/CumulusMX/web/

# Define mountable directories.
VOLUME ["/opt/CumulusMX/data","/opt/CumulusMX/backup","/opt/CumulusMX/Reports","/var/log/nginx"]

# Test File
COPY ./index.htm /opt/CumulusMX/web/

# Add Start Script
COPY ./MXWeather.sh /opt/CumulusMX/

# Add Nginx Config
COPY ./nginx.conf /etc/nginx/
COPY ./MXWeather.conf /etc/nginx/sites-available/
RUN ln -s /etc/nginx/sites-available/MXWeather.conf /etc/nginx/sites-enabled/MXWeather.conf && \
  rm /etc/nginx/sites-enabled/default

WORKDIR /opt/CumulusMX/
RUN chmod +x /opt/CumulusMX/MXWeather.sh

CMD ["./MXWeather.sh"]

# How to bail
#STOPSIGNAL SIGTERM

# Expose ports.
EXPOSE 80
EXPOSE 8998
And the final result is that my CumulusMX website is now running on my docker host, and is successfully auto-updating. I added a script to the host, which is listed in a daily cron job to rebuild the container periodically, allowing the site to never be out of date.
#!/bin/bash
cd /opt/MXWeather
docker stop MXWeather && docker rm MXWeather
docker build -t ubuntu:MXWeather .
# To run:    docker run --name=MXWeather -p 8998:8998 -p 8080:80 -v /opt/MXWeather/data:/opt/CumulusMX/data -v /opt/MXWeather/backup:/opt/CumulusMX/backup -v /opt/MXWeather/log:/var/log/nginx -v /opt/MXWeather/Cumulus.ini:/opt/CumulusMX/Cumulus.ini --device=/dev/hidraw0 -d ubuntu:MXWeather
The website is up, live and functioning. Hooray. We successfully containerised CumulusMX deployment.